Windows Dedicated Server Hosting[]
nstp-run.bat[]
Use this batch file to setup and run the dedicated server. It creates a loop where it will install or update the server on each run. You do not need to run steamcmd before running this file. It will create a folder with the port number so that each instance of the server can be updated independantly. The server will automatically exit after 2.5-3 hours to prevent floating point precision issues with the time tracking and to keep the server up to date with the latest builds.
Be sure to set the host name in this batch file.
@echo off

rem Put this file and steamcmd from https://steamcdn-a.akamaihd.net/client/installer/steamcmd.zip into %LOCALAPPDATA%
rem Then use task scheduler to start tasks on boot passing port numbers to this batch file
rem Each server requires 3 ports, so add +3 between server instances. (17000, 17003, 17006, etc.)
rem Also be sure to open the UDP ports on the firewall

set PORT=%1
set HOSTNAME=us-test

cd %LOCALAPPDATA%
mkdir nstp-%PORT%

echo Port %PORT%

:loop
 	%LOCALAPPDATA%\steamcmd +login anonymous +force_install_dir %LOCALAPPDATA%\nstp-%PORT% +app_update 976380 validate +quit

 	cd nstp-%PORT%
 	del *.log
 	"Never Split the Party" -batchmode -nographics -port %PORT% +server.name %HOSTNAME%-%PORT% +server.minplayers 2
 	goto :loop
nstp-run-all.bat[]
Use this batch file to run all the scripts at once. Use the task scheduler to run it on startup.
@echo off
rem Create a task scheduler task to run this at startup. Be sure to set the start in folder option
start nstp-run 17000
start nstp-run 17003
start nstp-run 17006
start nstp-run 17009
start nstp-run 17012
start nstp-run 17015
start nstp-run 17018
start nstp-run 17021
start nstp-run 17024
start nstp-run 17027
To install or update the dedicated server you can download the SteamCMD command line version of steam from https://steamcdn-a.akamaihd.net/client/installer/steamcmd.zip See https://developer.valvesoftware.com/wiki/SteamCMD for full details on SteamCMD.
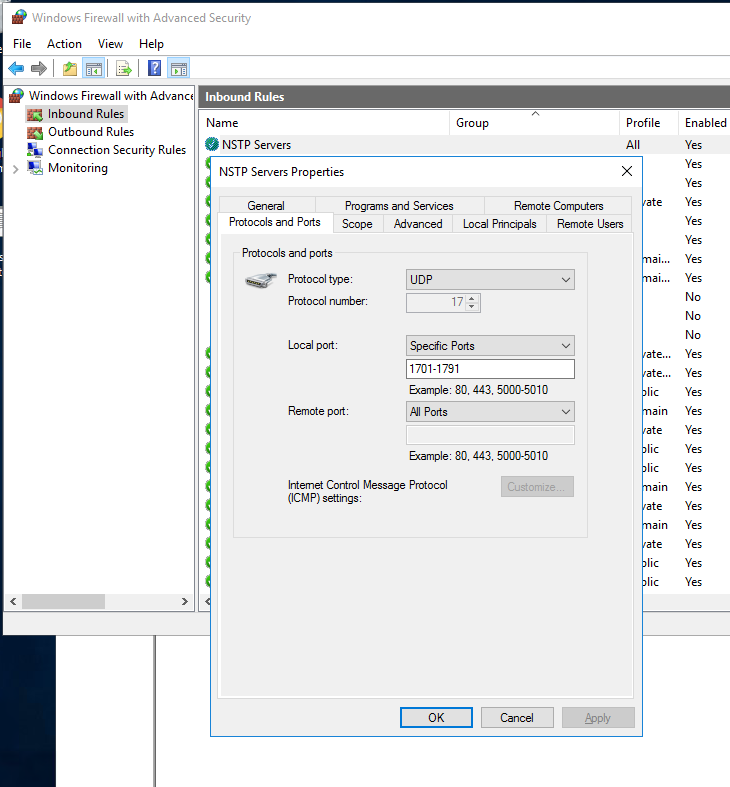
The ports can be set via the -port command. Defaut is ports 1701-1703 UDP. These will need to be opened on your firewall and port forwarded on your router if you are behind one.
Linux Dedicated Server Hosting[]
Ubuntu Setup[]
Run something like these to get steamcmd available in your home directory.
# ubuntu 18
sudo add-apt-repository multiverse
sudo dpkg --add-architecture i386
sudo apt update
sudo apt install lib32gcc1 steamcmd
ln -s /usr/games/steamcmd steamcmd


# if apt doesn't work try this
apt install lib32gcc1
cd ~
curl -sqL "https://steamcdn-a.akamaihd.net/client/installer/steamcmd_linux.tar.gz" | tar zxvf -
 ln -s steamcmd.sh steamcmd
nstp-run.sh[]
This is the main script that will install/update & run the game in a loop.
#!/bin/bash
PORT=$1;

cd ~
mkdir ~/nstp-$PORT

echo ""

while test 1 = 1 ; do
	~/steamcmd +login anonymous +force_install_dir ~/nstp-$PORT +app_update 976380 -beta test validate +quit

	cd ~/nstp-$PORT
	rm *.log
	./Never\ Split\ the\ Party.exe -batchmode -nographics -port $PORT +server.name $HOSTNAME-$PORT +server.minplayers 2
done
crontab[]
Use this crontab file to start the servers at boot. Remember to open the ports on your firewall. 17000-17100 UDP The linux server will not work with low port numbers like 1701.
@reboot ~/nstp-run.sh 17000
@reboot ~/nstp-run.sh 17003
@reboot ~/nstp-run.sh 17006
@reboot ~/nstp-run.sh 17009
@reboot ~/nstp-run.sh 17012
@reboot ~/nstp-run.sh 17015
@reboot ~/nstp-run.sh 17018
@reboot ~/nstp-run.sh 17021